Showing posts with label Gluten Free. Show all posts

Thursday, September 15, 2016

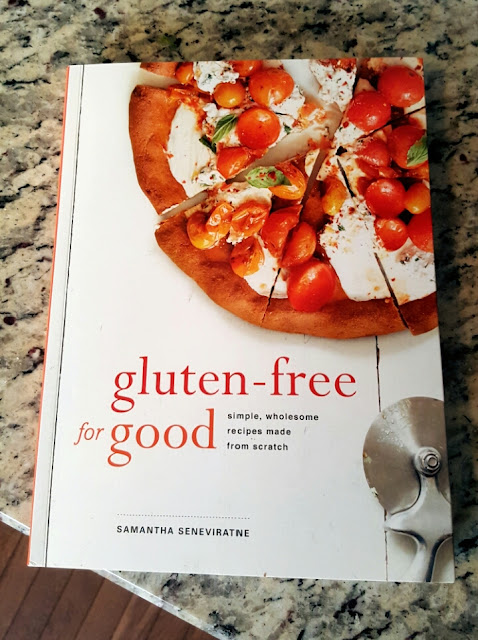
Gluten-Free For Good by Samantha Seneviratne

I have been eating gluten-free since March 2016. I have spent years with stomach/digestive issues. For some reason it took me a long time to realize it probably had something to do with my diet. I assumed it was dairy, I had tried to cut dairy out a few times in the past and felt okay for a little while but my love of cheese was too strong and I'd always cheat within a week. We went to lunch to celebrate my birthday in February, after lunch Rob and I went for walk at one of our favorite parks in Nashville. My stomach hurt so bad that we had to turn around and go home a few minutes after arriving to the park. That day I thought about what I ate. I had a turkey club sandwich at lunch. Something finally clicked in my head, I thought "what if is isn't dairy, it's gluten?". My mom has been gluten-free for years but I never thought of trying it myself. After that day I decided to cut out dairy and gluten. I didn't last long without dairy and starting eating it again after a few weeks. I stuck to not eating gluten longer and noticed that I felt better, the sores in my mouth had gone away and my stomach wasn't killing me anymore. It has been hard to stick to a gluten-free diet, especially in a house with four kids but so far I've done pretty well.

I am always on the lookout for a cookbook that will allow me to make delicious gluten-free foods. When I had the opportunity to review Gluten-Free for Good by Samantha Seneviratne I jumped at the chance!

gluten free for good
(photo credit: jenloveslife)
The cookbook is beautifully photographed. I enjoyed that Senevirante provides a list of gluten-free pantry staples. Another plus for me is that none of the recipes call for any sort of gum. I am not opposed to using a gum in recipes but I do prefer cheap and easy recipes, adding gums to a recipe does scare me so I typically avoid recipes that call for a gum.

There are so many tasty recipes it was hard to decide what to try first. I have made the Sweet Potato and Spinach Hash, it was so easy and delicious. I did leave out the mint because I didn't have any on hand. Next I would like to try the Chocolate Toffee Popcorn and the Spiced Doughnuts with Mocha Glaze. I am a sucker for sweets so both of these just sound too good not to try!

gluten free doughnuts
(photo credit: jenloveslife)
I would recommend this book to anyone who is looking for a gluten-free cookbook full of easy to create, delicious recipes. All of the recipes in the book call for readily available ingredients, almost all of the recipes called for items I have seen at my local grocery store. If there was something I wasn't familiar with I would just look for something similar to sub in its place. For example, the Amaranth Tart with Kale, Caramelized Onions, and Gruyere calls for Lacinato kale, I don't know what that is and my grocery store has regular kale or purple kale so I will just replace the Lacinato kale with whatever the grocery store has at the time. The tart looks amazing, I can't wait to make that soon.

I received this book from the Blogging for Books program in exchange for this review.

Monday, March 21, 2016

No Bake Gluten Free Oatmeal Bars


I am always trying to find something filling that Kid 3 can eat in the morning. Cereal typically upsets her stomach as does just about anything with dairy or wheat. I found a recipe for Coconut Mocha Vegan Protein Bars on Pinterest. I modified the recipe somewhat to suit Kid 3's tastes.

We use Bobs Red Mill Gluten Free Rolled Oats (affiliate link). I buy my coconut milk at my grocery store. There are several brands to choose from, I buy whatever happens to be the cheapest. I have yet to notice a difference in quality between the brands available at my store.

Gluten free and dairy free (if you use dairy free chocolate chips, I did not). These bars are great for an afternoon snack or as a filling breakfast bar.
No Bake Gluten Free Oatmeal Bars

by Jen Loves Life
Cook Time: 0
Keywords: breakfast dessert snack gluten-free vegetarian oatmeal coconut milk coconut chocolate 
Ingredients (12 Bars)
  • 3 cups gluten free rolled oats
  • 4 tablespoons ground flax seed
  • 1/4 teaspoon sea salt
  • 1 cup sunflower seed butter (or your favorite nut butter)
  • 1 teaspoon vanilla extract
  • 1/2 cup semisweet chocolate chips
  • 1/2 cup unsweetened shredded coconut
  • 1 can full fat coconut milk
Instructions
Line a8x8 baking dish with parchment paper. Allow for the paper to hang over the top of pan.
Use a food processor to grind the oats into a course meal, leaving some larger pieces of oats in the mix. Pour the oat meal into a large mixing bowl.
Add dry ingredients to oat meal. Stir to combine.
Add coconut milk and mix. Next add vanilla and sunflower seed butter. Mix well.
Pour in coconut and chocolate chips. I prefer to use mini chocolate chips because it just feels like there's more chocolate even though there isn't.
Transfer the mixture to the baking dish. Press the mix into the pan firmly. Cover pan and refrigerate for 20 minutes or longer.
Once bars have chilled remove from refrigerator. Lift block of bars from the baking dish using the extra parchment paper. Cut the bars into six long strips, then cut the strips in half.
I melted chocolate and coconut oil in the microwave and drizzled on top with a little bit of the unsweetened coconut, this step is optional.
Store the bars in an air-tight container in the fridge.
I store mine in freezer. Kid 3 just grabs one in the morning and sets it out of the counter while she gets ready for school and by the time she's done it's defrosted and ready to eat.
Powered by Recipage

Friday, March 18, 2016

Gluten Free Burrito Bowls


I love a good, messy burrito. I haven't eaten a burrito since going gluten free. I have been craving them big time. I made these chicken burrito bowls a few nights ago for the family and they were a big hit. They are so quick and easy to throw together. It might be my new favorite dinner!

Gluten Free Chicken Burrito Bowl

by Jen Loves Life
Prep Time: 10 minutes
Cook Time: 30 minutes
Keywords: grill entree gluten-free quinoa chicken
Ingredients (4 servings)
  • 2 cups cooked quinoa
  • 4 chicken thighs, boneless skinless
  • 1 can black beans
  • 1 can white corn
  • salsa verde
  • guacamole
  • sour cream
  • black olives
Instructions
Cook quinoa according to package directions.
Drain corn and black beans. Heat each separately in small bowl in microwave, about 2 minutes each.
Cook chicken. I grilled the chicken thighs on a stovetop grill pan but you can also bake the chicken until cooked all the way through, approximately 30 minutes. Dice chicken.
Add 1/2 cup cooked quinoa, 1/2 cup black beans and 1/2 cup corn to a bowl. Add diced chicken on top. Top with 2 tablespoons light sour cream, 2 tablespoons guacamole (I like Wholly Guacamole). Drizzle a few tablespoons of salsa verde and add a few sliced black olives. Enjoy.
Powered by Recipage

Wednesday, March 16, 2016

Three Ingredient Peanut Butter Cookies


These cookies are so easy to make and my girls love them. We make these all the time. Sometimes we add chocolate chips which almost make the cookies taste like a Reese’s Peanut Butter Cup. I like to use crunchy peanut butter but the girls prefer smooth peanut butter.

There are only three ingredients; sugar, peanut butter and an egg. The cookies are gluten free and dairy free.

3 Ingredient Peanut Butter Cookies

by Jen Loves Life
Prep Time: 5 minutes
Cook Time: 15 minutes
Ingredients (20 small cookies)
  • 1 cup Peanut Butter
  • 1 cup Sugar + more for dusting
  • 1 Large Egg
Instructions
Combine egg, sugar and peanut butter in a bowl. Once well mixed, spoon small amounts of cookie dough on an ungreased cookie sheet. Next, we dip a fork into a small amount of sugar and make the crisscross pattern on each cookie. We re-dip the fork for each cookie. Place cookies in oven and bake at 350 degrees for 12-15 minutes until the cookies are no longer shiny and look dry on the edges.
Powered by Recipage

Friday, August 16, 2013

Sweet and Salty Caramel Popcorn

I really wish I could bake, but I can't. Every time I try the item I am baking comes out of the oven as hard as a rock and ready to be used as a weapon. While I was making caramel popcorn for the girls I suddenly realized why I am so terrible at baking. I hate measuring!! I am terrible at making sure everything is measured, I like to throw things in a pot and call it a day. So, I will probably never be a great baker but at least I can make sweet treats for the kids that don't need to be baked.

Here's the recipe for my Sweet and Salty Caramel Popcorn. It is so gooey and delicious I could eat it all day long!!
caramel popcorn

Ingredients:

About 10 cups of air popped popcorn (this is a complete guess, I was going to measure so my recipe would be accurate but I forgot to. I filled my popper to the max fill line and used most of what popped out of the machine!)
popcorn
bowls of popcorn

One stick of unsalted butter

One cup of white sugar

Coarse salt

Directions:

Cook sugar on medium heat until it is completely melted. Make sure to stir the sugar constantly. (A took all my pictures so I could keep stirring).

Once the sugar is melted, add butter. Continue stirring and cooking over medium heat for five minutes. Remove from heat and allow to cool for five minutes.
stages of sugar

Arrange popcorn in a shallow layer in baking dish. Sprinkle salt over the popcorn and then drizzle with some of the caramel sauce. Add another layer of popcorn and sprinkle with salt and caramel. Continue layering until all the popcorn and caramel are gone. Mix with two forks to distribute the caramel to all the popcorn.

assembling caramel corn
making caramel corn
sweet and salty caramel popcorn
After the caramel is all mixed in I let it sit for a few minutes before letting the kids dig in.
taste testers
taste tester
enjoying caramel popcorn

Friday, June 7, 2013

Quick and Easy Alfredo Sauce

Fettuccine alfredo is probably one of my favorite things to eat! I don't make it often but when I do it is always delicious. Sometimes I make blackened chicken to go on top of the pasta and sometimes we use shrimp. Rob isn't a big fan of shrimp so we eat it that way whenever he isn't around! I always make broccoli with it because that is G's favorite way to eat her fettuccine alfredo.

Making the alfredo sauce is pretty simple. I use heavy whipping cream and an Italian cheese blend. Those two things are basically the only ingredients. I use whatever brand of cheese blend is on sale. This week I used Sargento. The sauce was as good as it always is. I typically roast garlic to add to the sauce but this week I forgot to buy garlic so I just added some garlic powder.

alfredo sauce

Here is the quick and easy recipe for alfredo sauce:

Ingredients
1 pint heavy whipping cream
1 package (8 ounces) Italian cheese blend
pinch of salt
pinch of pepper
1 tablespoon garlic powder (or 1 tablespoon roasted garlic)
alfredo sauce ingredients

Directions: 
Heat heavy cream on medium-low until warm, about five minutes. Add cheese blend, salt, pepper and garlic. Allow cheese to melt, stirring frequently. The cheese will melt in approximately 10 minutes. Once cheese is melted allow sauce to cook for an additional five minutes.

That's it! So simple but so delicious!

Once the sauce is done pour it on your fettuccine noodles and enjoy with whatever add-ins you like.

I cook the sauce on medium-low the entire time. I do not let the cream ever boil. The sauce will thicken the longer it sits after cooking. If the sauce becomes too thick I add a few tablespoons of butter to thin it out.

Friday, February 1, 2013

Confession Friday: I Love Fudge, Especially When it is Homemade

I have a deep love of fudge. It is quiet possibly the best candy in the universe. Everywhere we go, if a place sells fudge you can bet I'm buying it. I've had fudge from Knott's Berry Farm back home in California and Sea World San Diego every time we went. I have also had fudge from Bass Pro Shops and even grocery store fudge. The best store-bought fudge has to be from the Rocky Mountain Chocolate Factory though. And, that place has so many other goodies, you could seriously gain ten pounds just walking into the store!

We had a tradition as a kid that every year we had fudge at Christmas. It was basically the only time each year that I had fudge, I looked forward to it very much growing up! My mom had the recipe written down in her recipe book, the recipe was from my grandma, which I think made me like the fudge even more. Each year I would feel like we were including my grandma with our Christmas even though she wasn't around anymore.

When I became an adult I was very excited to make the fudge on my own. One Christmas I volunteered to make the fudge and bring it to my parents' house for Christmas dinner. I asked my mom for the recipe. She pulled out her book and wrote it down for me. I went to the store with Rob and we began gathering all the supplies. I was so excited. As we grabbed the marshmallow fluff, a key ingredient, I turned the jar over. What did I find on the back? I was shocked to see my grandma's recipe on the back of the marshmallow fluff jar. I felt bamboozled! I couldn't believe that what I thought was a treasured family recipe was something of the back of a jar! Robert, of course, thought it was hilarious. We went home with the ingredients and made the fudge. It was delicious, just like always.

Since the first time I made my grandma's fudge to now the marshmallow fluff jar has changed the recipe slightly. I follow the new recipe, simply because I lost the original recipe my mom gave me. I have since written down the fudge recipe in our recipe book, just in case the makers of the fluff decide to change it again or for some reason they put a new recipe on the back of those jars!

Even if it isn't my grandma's recipe this fudge is the best! Much better than any other fudge I have bought. I would eat homemade fudge maybe everyday! I love it so much, I wish I had some right now. Maybe someday I'll get creative and make something other than plain fudge, maybe some peanut butter fudge, or do a caramel swirl, or even a mint fudge. Ooh, the possibilities are exciting me!

Once we get into a house it will be the first treat I make since we didn't have it this Christmas and most of us were very bummed about that. We don't have all of our pots and pans and cooking tools in the RV so I don't have a saucepan that would be good enough to cook the ingredients and I don't have a baking sheet large enough to cool the fudge on.

I am glad that three out of the four girls like fudge. So, I know they will continue to make it when they're grownups and I will be so excited to eat it when they bring it to my house for Christmas dinners!
Fantasy Fudge recipe

Saturday, January 5, 2013

Fish Tacos with Chipotle White Sauce


I LOVE fish tacos. Rob and the kids could do without them but they’ve decided to eat fish tacos for dinner once in a while just to please me, I love them (Rob and the kids!). The tacos are pretty simple and fairly cheap to make, two things that make me happy! 

I use frozen beer battered fish filets for the tacos. I cook the filets according to the package directions. Typically, I buy the Gorton’s brand but if I’m feeling extra cheap I’ll get the store brand fish. They taste similar. I chop green cabbage for the tacos. I make a chipotle white sauce for the tacos. This is fairly easy and simple too. I usually add a Pico de Gallo salsa to the tacos, too. The salsa gives the tacos nice color. Rob and the girls like their taco shells crunchy so I fry up their corn tortillas. I like soft fish tacos so I just warm my tortillas on the stove.

I wish I had tomatoes because it looks way prettier with tomatoes
We were out of tomatoes and I didn’t have time to run to the store

White sauce recipe:
1/2 cup sour cream
1/4 cup mayonnaise
1 lime, plus the zest
1-2 chipotle peppers in adobo sauce
1 TSP of adobo sauce
Salt and pepper to taste

Combine sour cream and mayonnaise in a bowl. Add zest of one lime. Squeeze half of lime juice into the mixture. Dice chipotle pepper. I usually use two peppers but it really depends on your own preferences. I cut the pepper open and scrape out the seeds, because I don’t like it too hot. Add a teaspoon of the adobo sauce to the mixture. Add salt and pepper, to taste. Mix well. I like to refrigerate the sauce for about 20 minutes before using but you could use it immediately.

Pico de Gallo salsa recipe:
3 medium tomatoes
1/2 large white onion
1 bunch of cilantro

Dice onions. Dice cilantro. Chop tomatoes. Mix all ingredients in a bowl. Sometimes I add a dash of Tabasco for a kick. I usually chop the ingredients in the food processor. Just don’t let it go too long or the salsa will turn to mush. You want it fairly chunky. You could also dice a jalapeno pepper for a little more kick or leave it plain if you don’t like your salsa spicy.
Related Posts Plugin for WordPress, Blogger...